> ## Documentation Index
> Fetch the complete documentation index at: https://dataleap-469bb19d-docs-from-commits-2026-08-19-upload-limits.mintlify.site/llms.txt
> Use this file to discover all available pages before exploring further.
# Connect your tools
> Connections are the agent's arms — set up once per account, activated per workflow with exactly the permissions needed.
Connections are the agent's **arms** — they define what it can reach and act on in your systems. Connecting happens on two levels, and both live in the build conversation.
## Level 1: Connect the tool to your account — once
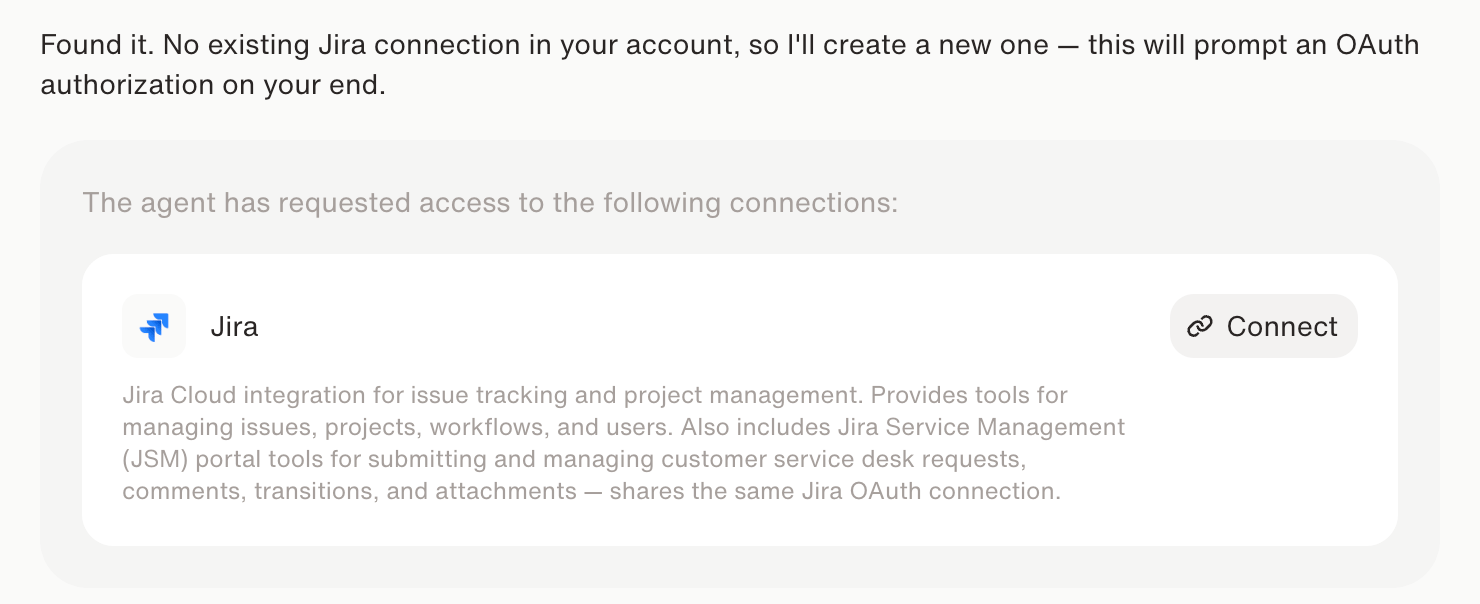
The first time a workflow needs a tool you've never connected, Dataleap tells you and prompts the sign-in right in the chat:
> *"No existing Jira connection in your account, so I'll create a new one — this will prompt an OAuth authorization on your end."*
You click **Connect**, sign in once, done. From then on, that connection exists for your whole account.
 You can also set up connections ahead of time under **Settings** > **Connected Apps** — the same place where you reconnect an expired login or review what's connected.
## Level 2: Activate it for the workflow — with exactly the permissions needed
An account-level connection doesn't give every agent free rein. For each workflow, the agent requests the **specific tools** it needs from that connection — and you see every single permission before approving:
You can also set up connections ahead of time under **Settings** > **Connected Apps** — the same place where you reconnect an expired login or review what's connected.
## Level 2: Activate it for the workflow — with exactly the permissions needed
An account-level connection doesn't give every agent free rein. For each workflow, the agent requests the **specific tools** it needs from that connection — and you see every single permission before approving:
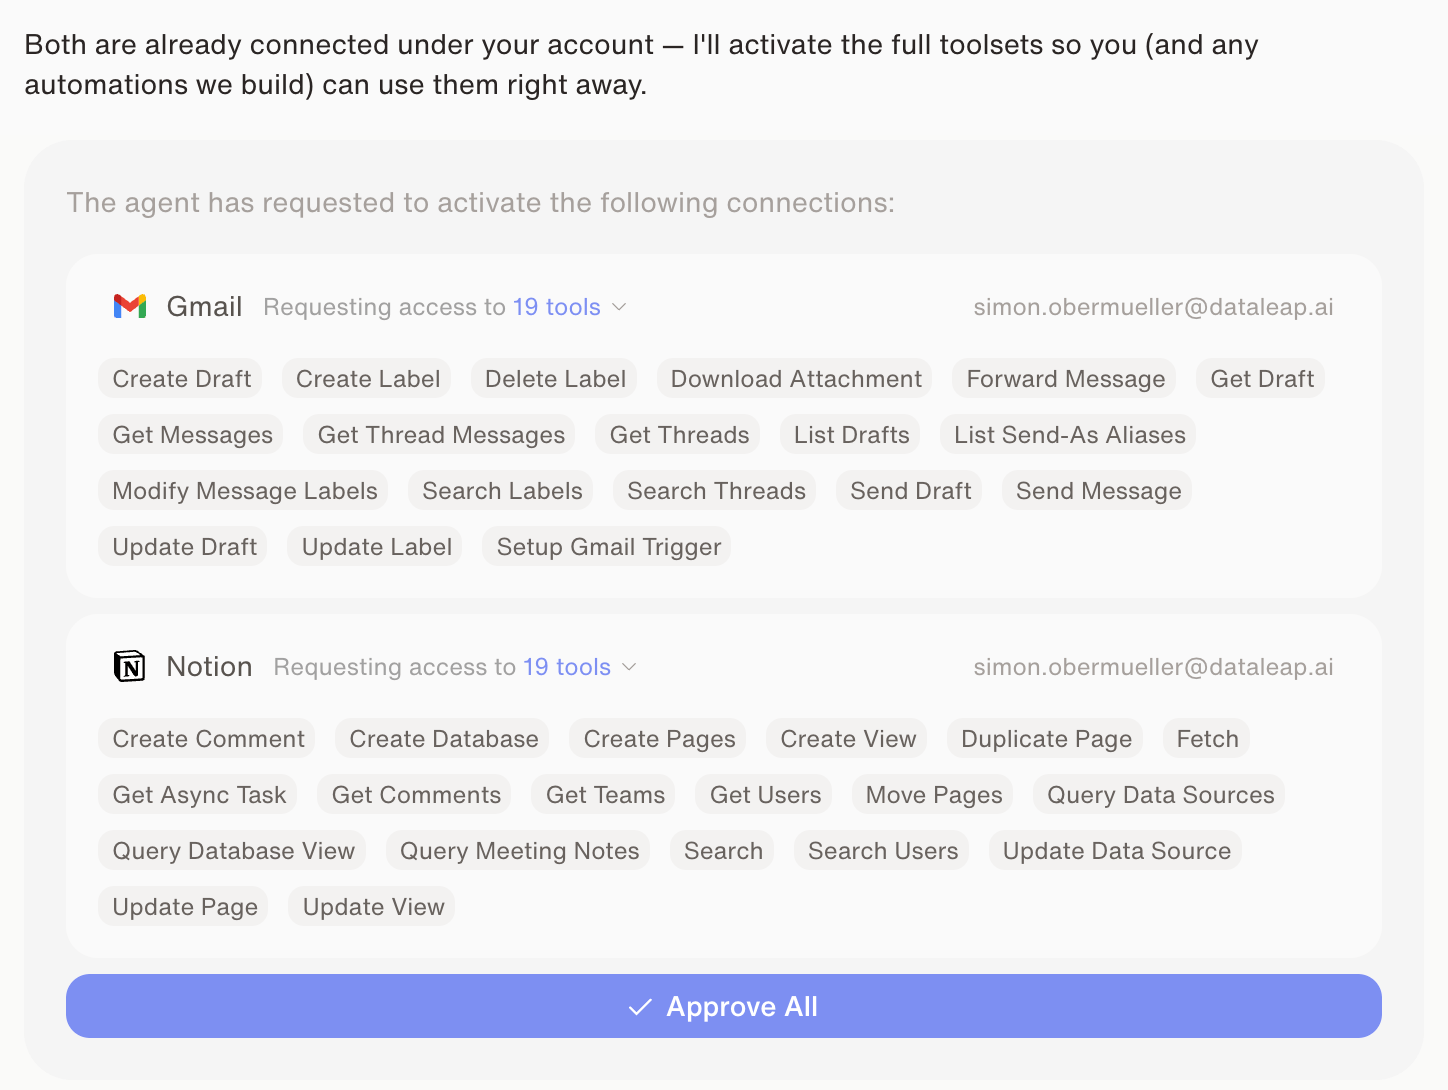 The gray labels are the permissions — *Create Draft*, *Create Label*, *Download Attachment*, and so on. Dataleap keeps this set **as small as possible**: enough for the workflow to run, and nothing beyond it. One click on **Approve All**, and the agent is equipped.
## What this means in practice
*"Give me a briefing before every meeting, based on my calendar and my emails."*
*"For that I'll need access to your calendar and your email — please connect your Google Calendar and your Gmail."* New tools get the one-time account connection; known tools go straight to the permission request.
Review the requested permissions and click **Approve All**. Connections are reusable — the next agent that needs Gmail skips level 1 entirely.
Workspace-wide governance (reviewing, reconnecting, removing connections centrally) is an admin topic: see [Connected apps management](/admin/connected-apps-management).
See the connection flow in action.
Next: give the agent your reference material.
The admin view: tool-level permissions and governance.
The gray labels are the permissions — *Create Draft*, *Create Label*, *Download Attachment*, and so on. Dataleap keeps this set **as small as possible**: enough for the workflow to run, and nothing beyond it. One click on **Approve All**, and the agent is equipped.
## What this means in practice
*"Give me a briefing before every meeting, based on my calendar and my emails."*
*"For that I'll need access to your calendar and your email — please connect your Google Calendar and your Gmail."* New tools get the one-time account connection; known tools go straight to the permission request.
Review the requested permissions and click **Approve All**. Connections are reusable — the next agent that needs Gmail skips level 1 entirely.
Workspace-wide governance (reviewing, reconnecting, removing connections centrally) is an admin topic: see [Connected apps management](/admin/connected-apps-management).
See the connection flow in action.
Next: give the agent your reference material.
The admin view: tool-level permissions and governance.